React Native @ The Knot

Our React Native app started as a project for one of our company hackathons. A small group of engineers from different teams across the organization collaborated to develop an MVP that competed and won against some stiff competition. The team, void of React Native developers, was able to immediately contribute to a codebase that was familiar to their every day React applications. They iterated quickly and delivered a functional native mobile application that ran on both iOS and Android — all in under two days.
Our Application and Team
It is important to give some background into both the application and the teams working on it . These both play a key role into what your experience will be with React Native.
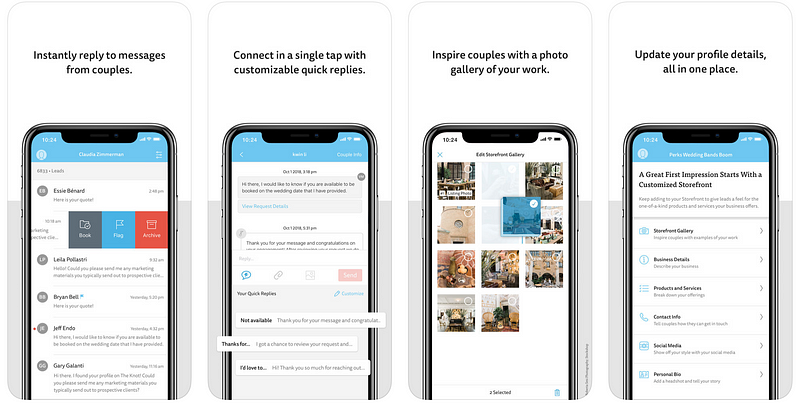
We maintain multiple mobile applications at The Knot, however, this is our first React Native application. The Knot Pro is an application geared towards wedding vendors and consists of many views, nested navigations, swipe-able lists, real-time chat, custom gallery grids, and gesture based interactions. It is a relatively simple application in that it is mostly just displaying data and providing forms for the user. This simplicity means that we are not trying to ride the bleeding edge of mobile application performance or API features.
This was a greenfield project.
Due to it being a greenfield project, we did not experience any of the pain points teams have integrating React Native with an already existing native application.
The hackathon project was completely re-written from the ground up. The initial squad rewriting the hackathon project was comprised of 4 full-stack engineers, all having extensive experience with React web development. Once the first version of our application was released, we shifted into multi-squad ownership of the application. Each squad owning a vertical (or high level feature) of the application. Each vertical almost always had a direct NPM package which allowed easy separation of ownership. Our usage of a monorepo eased the difficulties of developing a multi-package application (the implementation of which likely deserves its own blog post).
Why React Native?
Different, But Still Same

The result of the hackathon was a huge testament to React Native and summed up perfectly what we wanted to do with our engineering squads. We wanted to enable our full-stack engineers, who are unbelievable React developers, to own complete product verticals across all aspects of our platform: backend, web, and native mobile. React Native allows those engineers to transfer all of their knowledge from React web into mobile development — feeling right at home with their JSX, redux state management, jest testing, and creature comforts like [lodash](https://lodash.com/).
Keep It DRY
The ability for web developers to immediately contribute to a mobile application codebase is monumental and leads to another benefit of React Native — code reuse. Not only are you sharing code between iOS and Android, you can also share code between your web and mobile applications.
Developer Ergonomics
React Native brings with it the development speed of web applications. Web developers are use to the instant feedback provided by hot reloading and React Native brings this feature to native development. It’s jarring to discover XCode doesn’t have a similar counterpart. Android Studio, however, has a hot swap feature that functionally behaves the same. React Native JS bundling is orders of magnitude faster than an Android Studio or XCode re-compile. With React Native applications your code changes almost always live in JS, so if your app crashes due to a JS error you can always update your code and quickly live reload a delta bundle.
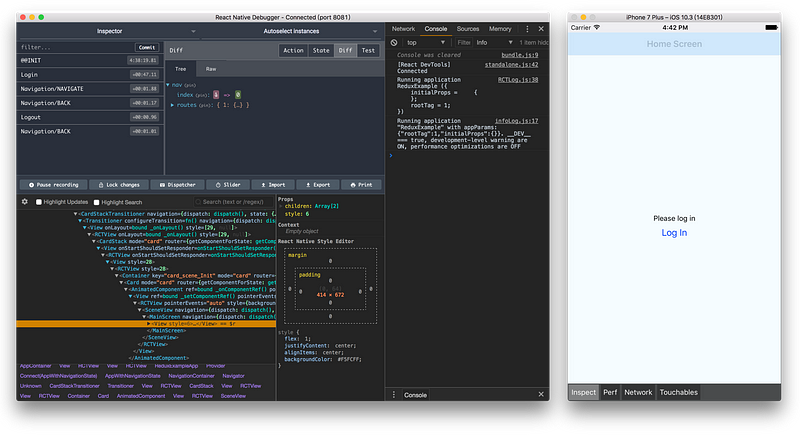
React Native Debugger
Our teams also use the React Native Debugger . It provides React Inspector, Redux DevTools, and network inspecting. Being able to inspect the network just like in chrome dev tools, inspect your React component hierarchies, and live update your stylings further blurs the line between web and mobile development.
Sharing Code
Our goal with React Native is to enable our current full-stack engineers to own their entire product vertical. For instance, squad X would own the “reviews vertical”, which consisted of all the core features around managing your The Knot storefront’s reviews: viewing reviews, requesting reviews, responding to reviews, disputing reviews, etc. All of these features exist both on web and native mobile. They talk to the same APIs, with the same payloads, execute the same business logic, and update the application state in the same way. The main differences are between the UI layout and interactions.
The opportunity to share your JS code and leave the layout and interactions up to the target application is what Robert Scarano of Squarespace coins “write it 1.5x” in his Organizing Code for Cross-Platform Web and Mobile Development talk.
We never wanted a “write once, run everywhere” solution. We wanted to allow both web and mobile the flexibility to layout the application and handle the interactions in the best possible way for the user while also reducing code redundancy. Giving those platforms a solid core to build from would enable our teams to develop the same feature on both platforms with minimal code duplication.
The first pieces of code that we made reusable were our clients that talked to our APIs. We were able to isolate the code that talked to our APIs into its own NPM package that could be imported into both web and mobile. So await reviewsClientInstance.getReviews(storefrontId)behaves the same way in web and mobile. The client also handles determining which environment the application is running in — relinquishing the burden of maintaining configurations for QA and Production API endpoints from the application. The code was thoroughly tested and documented and treated as “internally open sourced” to allow for easy on-boarding and usage from other teams.
99.99% Javascript
We did not create any native modules for our application; we used 3rd party modules that required some light configuration in native code. Other than that, 100% of our code was written in JS. There were very few instances where we needed to access things that were outside of React Native’s core APIs, and when we did there was already an open sourced module that did all the heavy lifting for us. In turn, we were relying on 3rd party modules that had far more functionality than we needed, only to use one or two simple methods they provided.
3rd Party Modules
One of the benefits of React Native is that you get to write all of your mobile code in Javascript. However, if you need access to a native API that has not been created (or updated) in React Native you will need to drill down into the native layer. We instead opted for consuming 3rd party libraries that filled these gaps for us. Some were well supported de-facto libraries in the community, and others were more shady 4 star back alley type libraries.
An example of our need to use a 3rd party library came with the discovery that React Native’s CameraRoll.getPhotos() method has a hard time returning photos that have been synced with iCloud. This is due to the current CameraRoll using ALAsset which is deprecated from iOS 8 and does not have the same support for iCloud photos that the Photos Framework does.
These types of problems kept routinely popping up with things like: cross platform push notifications, grabbing in depth device information, managing the splash screen, navigation, and vector icons — all requiring installing and configuring native modules (sometimes a simple react-native link command) to help fill the gaps of functionality.
Having more expertise with the native frameworks would have enabled us to create light-weight native modules catered directly to our use cases.
Component Library
We already had a component library for our web applications and saw the benefits in speed of development and design consistency it provided. We knew we wanted those same benefits in our native application so we built out a component library for our React Native application as well. The learnings we gained from our web implementation directly translated into our mobile implementation. We have plans to implement one component library that could be used to render items in both web and mobile. These would be the smallest foundations of UI; things like buttons, switches, typography, and icons, and would still allow the target platform to compose them into custom UI.
Redux Integrations
We started by integrating almost everything with Redux — forms, navigation, local UI state, etc.
We quickly discovered that every performance bottleneck was magnified when developing on mobile.
We noticed significant delays in our form inputs and navigation transitions. We made a decision to remove forms, navigation, and local UI state from our Redux state and only put things in Redux state that were globally important or needed persisted via [redux-persist](https://github.com/rt2zz/redux-persist). We moved from [redux-form](https://redux-form.com) to [formik](https://jaredpalmer.com/formik/) and immediately saw performance improvements in our text inputs.
Navigation
We chose to use [react-navigation](https://reactnavigation.org/) over the also popular [react-native-navigation](https://wix.github.io/react-native-navigation/#/) because of the flexibility RN provided. Our designers wanted an application that looked and behaved very similarly (minimal material and HIG influence) and RN allowed us to fully style the navigation the way we wanted.
Consistent designs
In order to keep our designs consistent across all screens and modals we created a Navigation.getNavigationOptions() helper method that acted as an additional layer on top of RN's navigationOptions configuration. It generates a preconfigured, theme-able, navigationOptions that consistently styled things like button placement, tap area, fonts, spacing, colors, and iconography.
Sharing local state between navigation and screens
RN affords a few ways of sharing local state between the navigation header and the screen. One method is to maintain the state with RN itself by using its navigation.getParam() and navigation.setParams() methods. Another method is to maintain the state with the screen and use this.state and this.setState(). And a final way is to move that local state into something like Redux.
We determined that the first method was the most optimal. We did not want to store state in redux that no other part of the application cared about. Storing the state with the screen meant that you would need to maintain two states, one for the screen, and one for the navigation. You would need to update the navigation state every time the screen state was modified, since there is no way to access the screens state from navigation. So instead we maintained the state with RN and allowed the changed to propagate down to the screen.
Supporting Two Applications
Although you are writing cross-platform code with React Native you are still testing, building, and distributing two independent applications.
Ensuring features and bug fixes perform properly on both platforms isn’t always as simple as opening up two emulators, one for iOS and one for Android, and testing out your code. There are a plethora of different device sizes, performance levels, and unique features (i.e notches, soft keys) that span across both platforms. Expecting an engineer to ensure their code works as expected across all possible combinations is unrealistic and slows down development time. We have a Github PR template that asks the engineer if they tested their code on both iOS and Android — the depth of which is at the discretion of the engineer. This serves to reduce the number of platform specific bugs caught by our QA team. Our QA team installs the build containing the new feature/bug fix on real devices and tests them manually. The QA team is responsible for maintaining a library of devices that covers our user base.
We currently maintain two different CI/CD pipelines for our application. One for iOS and one for Android. We maintain them on two different CI/CD tools, buddybuild for iOS and bitrise for Android. We are currently in the process of migrating our iOS pipeline over to bitrise to help consolidate the configurations. Although buddybuild is a fantastic product, and was incredibly simple to use, they no longer support Android after their acquisition by Apple.
After your application is tested and built via CI/CD you will need to distribute it. Distribution is done via App Store Connect for iOS and the Google Play Console for Android. Both have differences in their distribution requirements, review processes, and beta testing that your team will need to become familiar with. We found the Google Play Console to be overall a better experience. Their alpha/beta testing was easier for our users to understand and did not require them to install an additional application (TestFlight) or manage a redemption code. The alpha or beta application simply appears in their Google Play app like any regular application.Our experience with React Native was, and continues to be, a great one. It blurs the lines between mobile and web development and allows teams to write reusable code across platforms.
After our first deep dive with React Native, it is evident that having proficiency in the native platforms provides great benefit. However, with the use of some third party libraries, we were able to move design, develop, and release at a much higher rate.
Ps: Check out the experiences our Design team had while working with React Native.